Introduction
By adding a Website to the Everprotec Dashboard you can use the dashboard to manually generate links to invite individuals to complete age verification or develop an integration to automatically send people to our Age Verification Gateway. Currently, you may add up to 10 websites to the dashboard. If you need to add more, please contact us at support@everprotec.com and explain your use case so we can help you.Adding Your Website
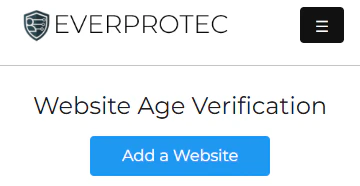
Adding a website to the Everprotec Dashboard is a simple process! From your dashboard, navigate using the Website card link to go to the dashboard for adding websites. Once you are on your website dashboard, you can click the “Add a Website” button to begin the setup process. The button will be visible in your dashboard at the top of the page as seen in the example below.
Setting Up your Website Configuration
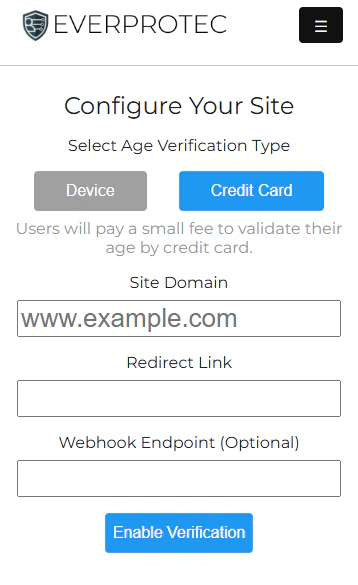
To configure your website, first select whether you want individuals to verify by Credit Card or by Device. This can be changed at a later date by returning to the website settings and updating them. With credit card verification, the cost is covered by the person getting verified. When using device based verification, you will cover the verification costs with credits in your account. Click here to view the verification fees.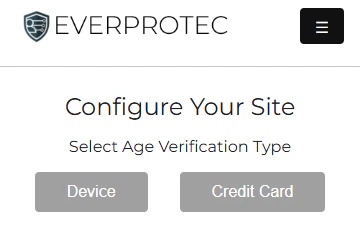
www.example.com placeholder. Next you will need to add a URL for redirects. This will be the location users will be sent to after they have completed age verification. This URL can be for your site or community page.
As an optional step, you may want to receive a notification somewhere, using your website or a service like Zapier, when the user has finished verifying. If this is the case, you can paste the webhook URL in the “Webhook Endpoint” text box seen below. Once you are satisfied with your configuration, click the “Enable Verification” button to finish adding your site.
Viewing and Editing Your Website Settings
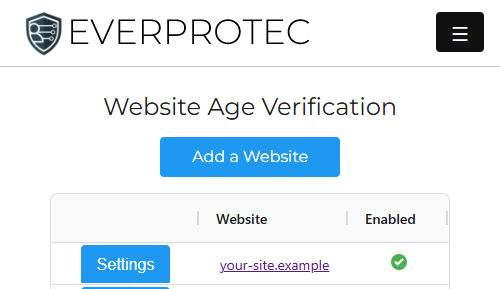
After you add your site, you can navigate back to the website dashboard to view your websites and edit the settings by clicking the “Settings” button next to the site name.